


 Here's what you'll need if you do it like I did:
24x36 canvas
paint to finish out the sides and edges
fabric (at least fat quarter width works best, but you could use scraps and piece them)
iron-on transfer labels
mod podge (I used the gloss)
sponge brush
iron
cutting mat and rotary cutter make it easier to cut the strips, but if you have decorative scissors that will cut your fabric (mine were too dull) you could do that
I downloaded some cute fonts from here. There are even directions on how to get them to show up in your dropdown menu, which I never knew how to do.
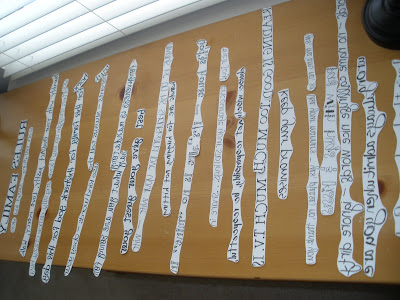
I typed out the rules I wanted to use and set up my page for landscape. I tried out different fonts on each one until I found the one I wanted in the size I wanted. I had the margins at 1/2" on each side and to fit on the canvas they can't run much past two full lines. I printed them out on plain paper and cut them out to see if they would fit and if I liked the fonts before I printed them on the transfer paper.
When you print them on the transfer paper you have to print them as a mirror image. Then I cut all of those out prior to ironing them on the fabrics I chose.
 I placed an old moving box on the table with a beach towel on it. The nice thing was that the towel had lines on it so it made it easy to line things up as I was ironing.
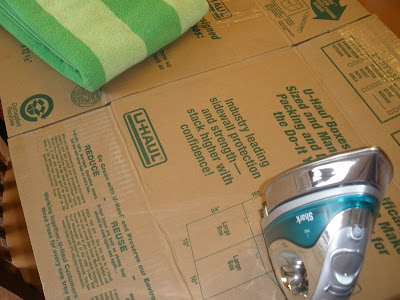
 I used 11 different fabrics and repeated all of them except for a couple. Once I got all the words ironed on I started cutting them out.
 I lined everything up before I started mod-podging it on.
 When I was done I decided that I didn't like the way the edges looked all different lengths, so I cut some of the dot fabric for the sides. It covers almost all of the ends.
 Then you just mod podge it until it's stiff like my hair in the '80s and '90s.
It hangs in my newly painted 'mud room'.

 My family rules were taken from other family rules I'd seen, some were original, and some a combination of the two.

 The transfer does show up a little, but not as much as in the pictures with the flash.
 I'm ready to make another one for the second floor outside the kids' bathroom and bedrooms. I think it will need to be a slightly smaller canvas because of the space, so if it is I'll have to alter everything. But I'm still going to do it sometime soon.
I got my ideas for the family rules here, here, and here.
This post is linked to Works-For-Me-Wednesday at We Are THAT Family and Show and Tell Friday at My Romantic Home.
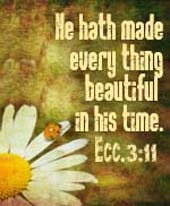
FAMILY RULES
Act justly, Love mercy, Walk humbly with your God
thank God for this day, for this family, for this home
use kind words - obey your parents - always tell the truth
sing silly, dance crazy, hug often, snuggle up, say I love you
always admit when you are wrong
say what you are sorry for - forgiveness is mandatory
give your guest your best
husband love your wife - wife always be on his side
hands are for hugging, not hitting
there is no “mine” in this house - it’s all God’s
encourage your siblings. . .share in their joy!
act responsibly, be respectful, choose wisely
too much t.v. is bad. . .too much reading is good
keep your promises
use your manners - yes, please; no, thank you; yes, ma’am; no, sir
pay with hugs & kisses
use nice words - ignore dirty words - no name calling
love the Lord your God


15 comments:
I love this! What a wonderful idea! You are one clever lady! So cute!
Nothing to add except to tell you how stinkin cute these are! You should sell them! Great job and thanks for sharing!
cute! I did something like this for a friend but I did friendship rules instead and used paper. Love the idea of the fabric though!
I just love this! It turned out great - you could sell them!
What a cute and creative idea! I wish I'd had this when my kids were little! I may have to borrow this idea, but I definitely will share it with my friends!
This is a wonderful and clever idea.
Kayren, I love this!
That is so cute and so fun looking!! I love the whimsy colors!!~
these are all really great things to remember! nice idea.
Kayren,
This is a great project idea, and I love your tutorial. I have a huge box full of pretty fabric leftovers that would be perfect for this.
Also I read your comment on my blog about how you are going to paint the ceilings in you home. I want to tell you to be sure and use FLAT paint (if your ceilings are smooth) so you don't see lines and streaks. I learned the hard way once and had to repaint.
Cathy
Okay, I'm really late in the comments here....but....just so you can laugh...I struggled to read the pictures of the rules...and then realized they were at the bottom and felt like a total dork. HA! It is so bright and totally YOU!!!
Love the bright colors. This is a great idea for around the house, always a reminder to treat others well. Thanks for sharing.
What a wonderful project! I love the cheerful colors and the beautiful rules.
Hi Karyn
It's been awhile since I've stopped by...I love your creativity. And the way that your are sharing the rules for all to see.
Love it!
Leann
This really turned out great, Kayren! I haven't seen one done with fabric before~very creative! Mine is still in the works, February has been too busy:)
Post a Comment